Most people who tell me they want low-impact home cardio are actually telling me three things at once. Their knees have opinions. Their apartment is small. And they have twenty minutes, not an hour.
I coach indoor rowing in Seattle, and I have taught more than a thousand people to row on machines, from the cheap magnetic wobble-fest to the Concept2 that never dies. The routine below is the one I hand to beginners who want to sweat without pounding their joints, and it fits in a hallway.
The setup takes two compact machines and about six feet of floor. The work takes twenty minutes. The rest is technique, and technique is free.
Why you should trust me
I rowed in college, then coached for years at a CrossFit box and a dedicated rowing studio. That means I have watched a lot of people climb onto a rowing machine with great intentions and terrible sequencing, and I have watched a lot of cheap machines give up under them.
I test machines the way I coach: twenty-minute steady-state sessions, sprint intervals, and a fit check for tall bodies and short bodies. I keep a maintenance log. If the seat starts clicking, I hear it before the owner does.
What I will not do is pretend I have put a stopwatch on every unit in this price band. I have not. What I can tell you is what a machine has to do for a routine to survive past February, and how to judge whether the one you are looking at will do it.
How I judge a machine for this routine
Four questions, in order.
Does the resistance feel the same at the start of the stroke and at the end? If it fades or spikes through the pull, you will spend your session fighting the machine instead of training on it.
Does the monitor tell you something honest? Stroke rate and elapsed time are real numbers. The calorie readout is a guess wearing a lab coat. I have watched people chase calories on a monitor that was essentially making them up, and I would rather you never learn that habit.
Does the seat roll without clicking? A click on day one is a rattle by month three. The seat is the cheapest part of the machine and the first thing to tell you the truth.
Would I put a beginner on it and walk away? If I feel like I have to stand over the machine to keep someone safe, it is not the right first machine.
Two machines pass those questions for the small-space version of this routine. One is the rowing piece, one is the seated piece.
The two machines that make this work
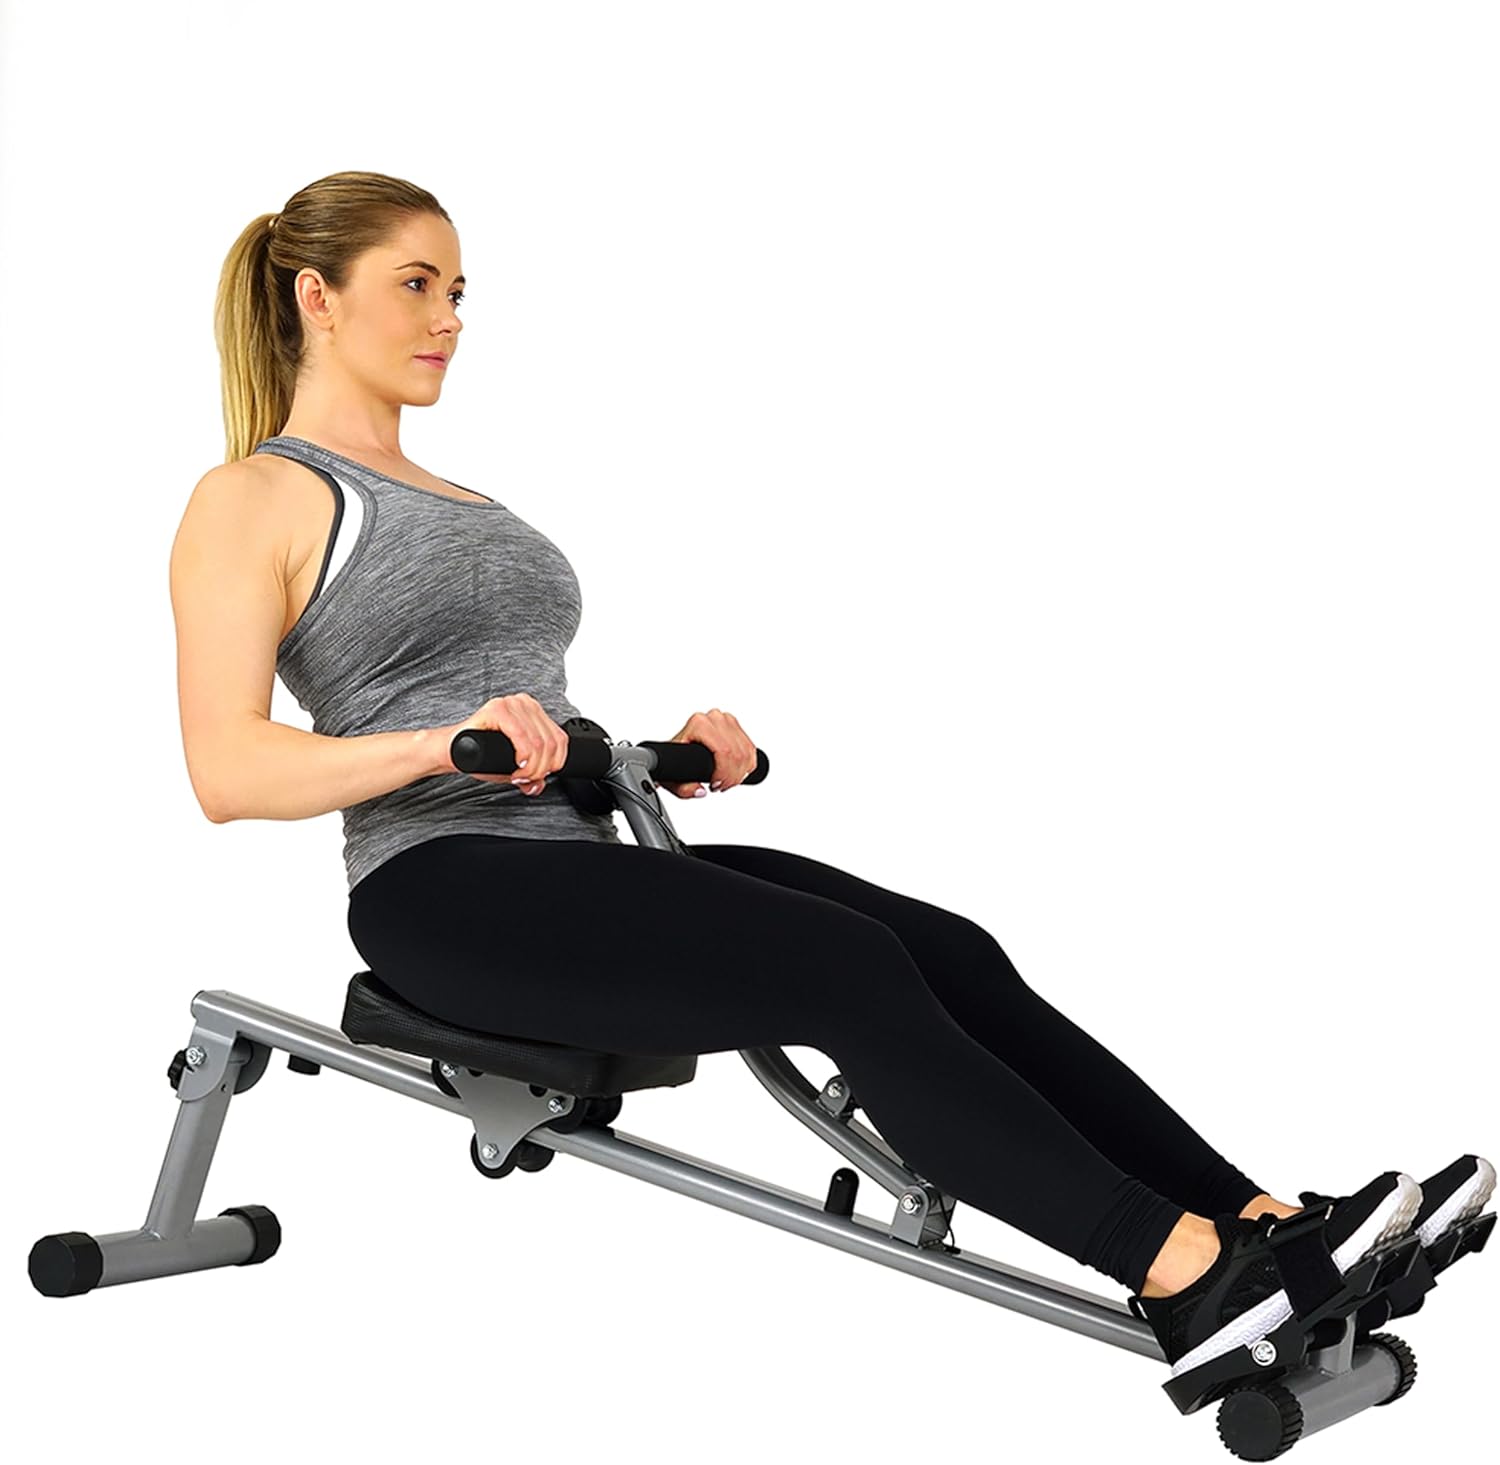
The rowing piece: Sunny Health & Fitness Compact Hydraulic Rower with 12-Level Resistance
 Visit on Amazon →
This is a hydraulic rower, and I want to be straight with you about what that means. The resistance comes from pistons, not a fan and not a water tank, so the pull is shorter and the load is set by a dial rather than by how hard you drive. The 12 levels give you somewhere to progress, and the compact frame is the whole reason it belongs in this article: it lives against a wall when you are done.
What it gives you is a seated cardio option that takes your knees out of the impact business entirely, plus a resistance dial with twelve steps to grow through. What it will not give you is the long, even pull of an air rower, and if you try to compare your times on it to a Concept2 you will be sad. Do not do that. Use your own timer and your own stroke rate, and treat the machine as a place to build the habit.
Two honest notes. Hydraulic cylinders warm up as you row, so the first two minutes feel lighter than the last two, which is exactly why the warm-up below is not optional. And the monitor is basic, so bring a phone timer or a wall clock.
Flaws but not dealbreakers: the stroke length is short, so if you are tall, expect to feel cramped at the catch. Test it early and use the return window if it does not fit your body.
Anyone in a small apartment who wants a seated, low-impact cardio habit without dedicating a room to it should start here.
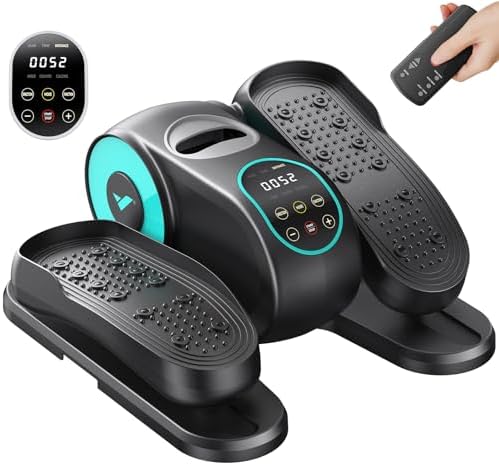
The seated piece: MERACH Under Desk Elliptical, Leg Exerciser While Sitting for Seniors
 Visit on Amazon →
This is the machine for the days you cannot get down onto a rower seat, or the days your knees are not interested in load. You sit in your own chair and pedal. It keeps blood moving, keeps the habit alive, and it costs you no floor space because it lives under a desk or beside the couch.
Here is the caveat, and it is a real one: a seated elliptical is not a cardio replacement for the rower. It is a movement snack, not a meal. Do not log it as a workout and do not expect your heart rate to look like a rowing interval. Use it on off days, during long calls, while you watch a game. Twenty minutes of easy pedaling is a great way to keep the routine alive on a day that would otherwise be a zero.
Flaws but not dealbreakers: on hardwood the unit can creep, so put a mat under it. And seat height matters, because if your knee stays too bent at the top of the pedal stroke you will feel it in your kneecap. Sit taller before you blame the machine.
Anyone whose balance, knees, or work schedule makes standing cardio hard will get real use out of this.
The actual routine
Step one: Set up the space. Clear about six feet of floor in front of a wall. Rower against the wall, seated elliptical under the desk or beside the couch. If you have to move furniture to start, you will not start.
Step two: Warm up for four minutes. Easy strokes, lightest resistance, no goal other than waking up the movement. Your knees, hips, and shoulders all need the first two minutes. Hydraulic resistance changes as it warms, so this also lets the machine settle before you ask anything of it.
Step three: Check your sequence before you add effort. Legs, then back, then arms on the drive. Arms, then back, then legs on the return. Most beginners pull with their arms first and wonder why their back hurts after ten minutes. Slow the stroke down, feel the catch, and let the machine do its job while you do yours.
Step four: The main set. Steady option: twenty minutes at a stroke rate of 20 to 22, resistance set so you can speak in short sentences but would rather not. Interval option: eight rounds of 40 seconds hard and 40 seconds easy, with the stroke rate climbing to 26 or 30 on the hard pieces. If you are new, stay on the steady option for two weeks before you touch intervals. Intervals punish bad form, and bad form is what you are here to fix.
Step five: Watch the right numbers. Stroke rate, elapsed time, and how your breathing sounds. That is it. Ignore the calorie readout entirely. If you need a second number, count your strokes per minute and try to hold it steady through the last five minutes, because that is where discipline lives.
Step six: Use the seated piece on off days. Fifteen to twenty minutes of pedaling while you do something else. Or ten minutes before a row to wake up the knees. It is the cheapest insurance you can buy against a missed session.
Step seven: Cool down. Two minutes easy on the rower, then stand up and walk around the room. Do not skip this. The finish of the stroke is where most form breaks down, and it breaks down faster when you are tired.
Where this routine breaks down
You want to compare yourself to other people. Then you want an air rower and the Concept2 community, where the rankings keep you honest. A hydraulic rower is a training tool for a habit, not a scoreboard.
You are tall. Compact hydraulic machines have a short pull. Sit on it early, and if the catch feels cramped, return it. No amount of good technique fixes a machine that does not fit your body.
You expect the seated elliptical to carry the cardio load. It will not. It is there to keep the habit warm on days the rower is not happening.
You want quiet. I will not call any machine quiet without a meter reading, and I am not going to start now. Hydraulic pistons make a soft whoosh, not silence. In an apartment with thin floors, put a mat down and row during normal hours.
The seat starts clicking. Listen to it. The seat is telling you something about the rail, and the fix is usually tightening hardware rather than buying a new machine.
What this all costs you
The real cost here is time, and it is small. Twenty minutes, five days a week, is 100 minutes out of your week. Both machines sit in the entry tier of home fitness gear, so check current Amazon price on each before you decide, and remember that the machine you use is cheaper per session than the machine you admire.
If the routine holds for a month, and you find yourself wanting splits you can compare across machines, rankings, and a rower that will survive a decade of intervals, then save for an air rower and keep the compact one for travel weeks and low-motivation weeks. That is a real upgrade path, and it starts with proving you will show up.
Do this once, keep the setup small enough that you cannot talk yourself out of it, and let the habit do the heavy lifting. The machine is 20% of the workout. You are the other 80%.