Home rowing machine maintenance is the least glamorous part of owning an erg, and it is the reason two identical machines can feel completely different after a year. I coach indoor rowing in Seattle, and I have watched the same story play out in home gyms all over the city: someone spends three months researching which rower to buy, then never oils the chain, never vacuums the rail, and never checks whether the bolts under the seat are still tight.
The chain is where most home maintenance gets skipped. Air rowers run a nickel-plated chain through a bushing, and that chain does real work thousands of times a session. A dry chain wears the sprocket, the sprocket wears the chain, and inside a year your stroke feels gritty at the catch.
This is the routine I run on every machine I coach on, in order, with the parts you actually need. It takes about 20 minutes a month once you know the steps.
Why you should trust me
I rowed in college and I have coached more than 1,000 people on indoor rowers since, first at a CrossFit box and now at a rowing studio. My job is keeping a room full of machines feeling the same for every athlete who sits on them, from the 6-foot-4 guy who needs the foot stretcher all the way down to the 5-foot-2 woman who needs it all the way up.
I test machines the way I coach: 20-minute steady-state sessions, sprint intervals, and the tall person and short person fit test on the same unit. I keep a maintenance log on the machines I use, and the log is what taught me that the chain, not the frame, is what ages first. The erg doesn't lie, and neither does a chain that has not been oiled since the machine came out of the box.
What I look for in a maintenance kit
You do not need much. A rag, a vacuum with a brush attachment, an Allen key set, and one good lubricant will cover almost everything that goes wrong on a home rower.
For the lubricant, I want three things. It has to be made for a chain that moves fast under load, not a general household oil that flings off. It should go on thin and stay put, so it works into the pins instead of pooling on the rail. And it should not attract grit, because a sticky chain picks up dust and turns into grinding paste.
The routine itself does not change much from one rower to the next. What changes is how much of it you have to do. A chain-drive air rower needs the most attention. A magnetic rower needs the least. A water rower needs a different kind of attention entirely, which I get to below.
The gear you need before you start
Two things make this easier: the right lubricant, and a machine that is worth maintaining in the first place.
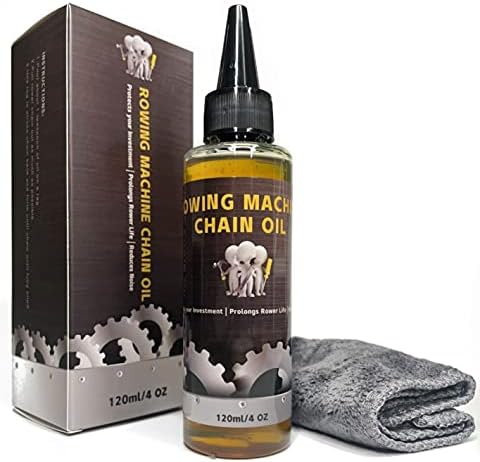
Our pick: TreadLife Fitness Concept 2 Rowing Machine Chain Oil | Lubricates and Protects Rower from Rust & Dirt | Compatible with All Chain-Drive Rowers, Including Concept 2 Models A B C D E
 Visit on Amazon →
This is the bottle I keep in my gym bag, and it is the one piece of maintenance gear I would hand a new rower before anything else. It is formulated for chain-drive rowers, and the listing names compatibility across the Concept2 line from the Model A through the Model E, which covers essentially every chain-drive erg you will find in a home gym, including the older machines that are still the backbone of the secondhand market.
The job it does is simple: it lubricates the chain links and protects them from rust and dirt. That matters more than people think, because a rowing chain lives in a sweaty room, and sweat plus a bare nickel chain is how you get a stiff link. A stiff link is the click you feel at the catch, and once you feel it, you cannot unfeel it.
My method: wipe the chain down with a dry rag first to pull off loose grit, then run a thin bead of oil along the length of the chain while you slowly pull the handle out. Do not soak it. A thin coat that works into the pins is the goal, and anything extra just flings onto the rail and collects dust. Row easy for two minutes to work it through the sprocket, then wipe off whatever is left on the outside of the links.
Flaws but not dealbreakers: It is a single-purpose bottle. You will not use it on your bike or your door hinges, and you should not, because it is built for a chain that runs slow and pulls hard. Buy it for the rower and keep it with the rower.
Anyone with a chain-drive rower, which is most people reading this, will use this bottle more than any other accessory they own.
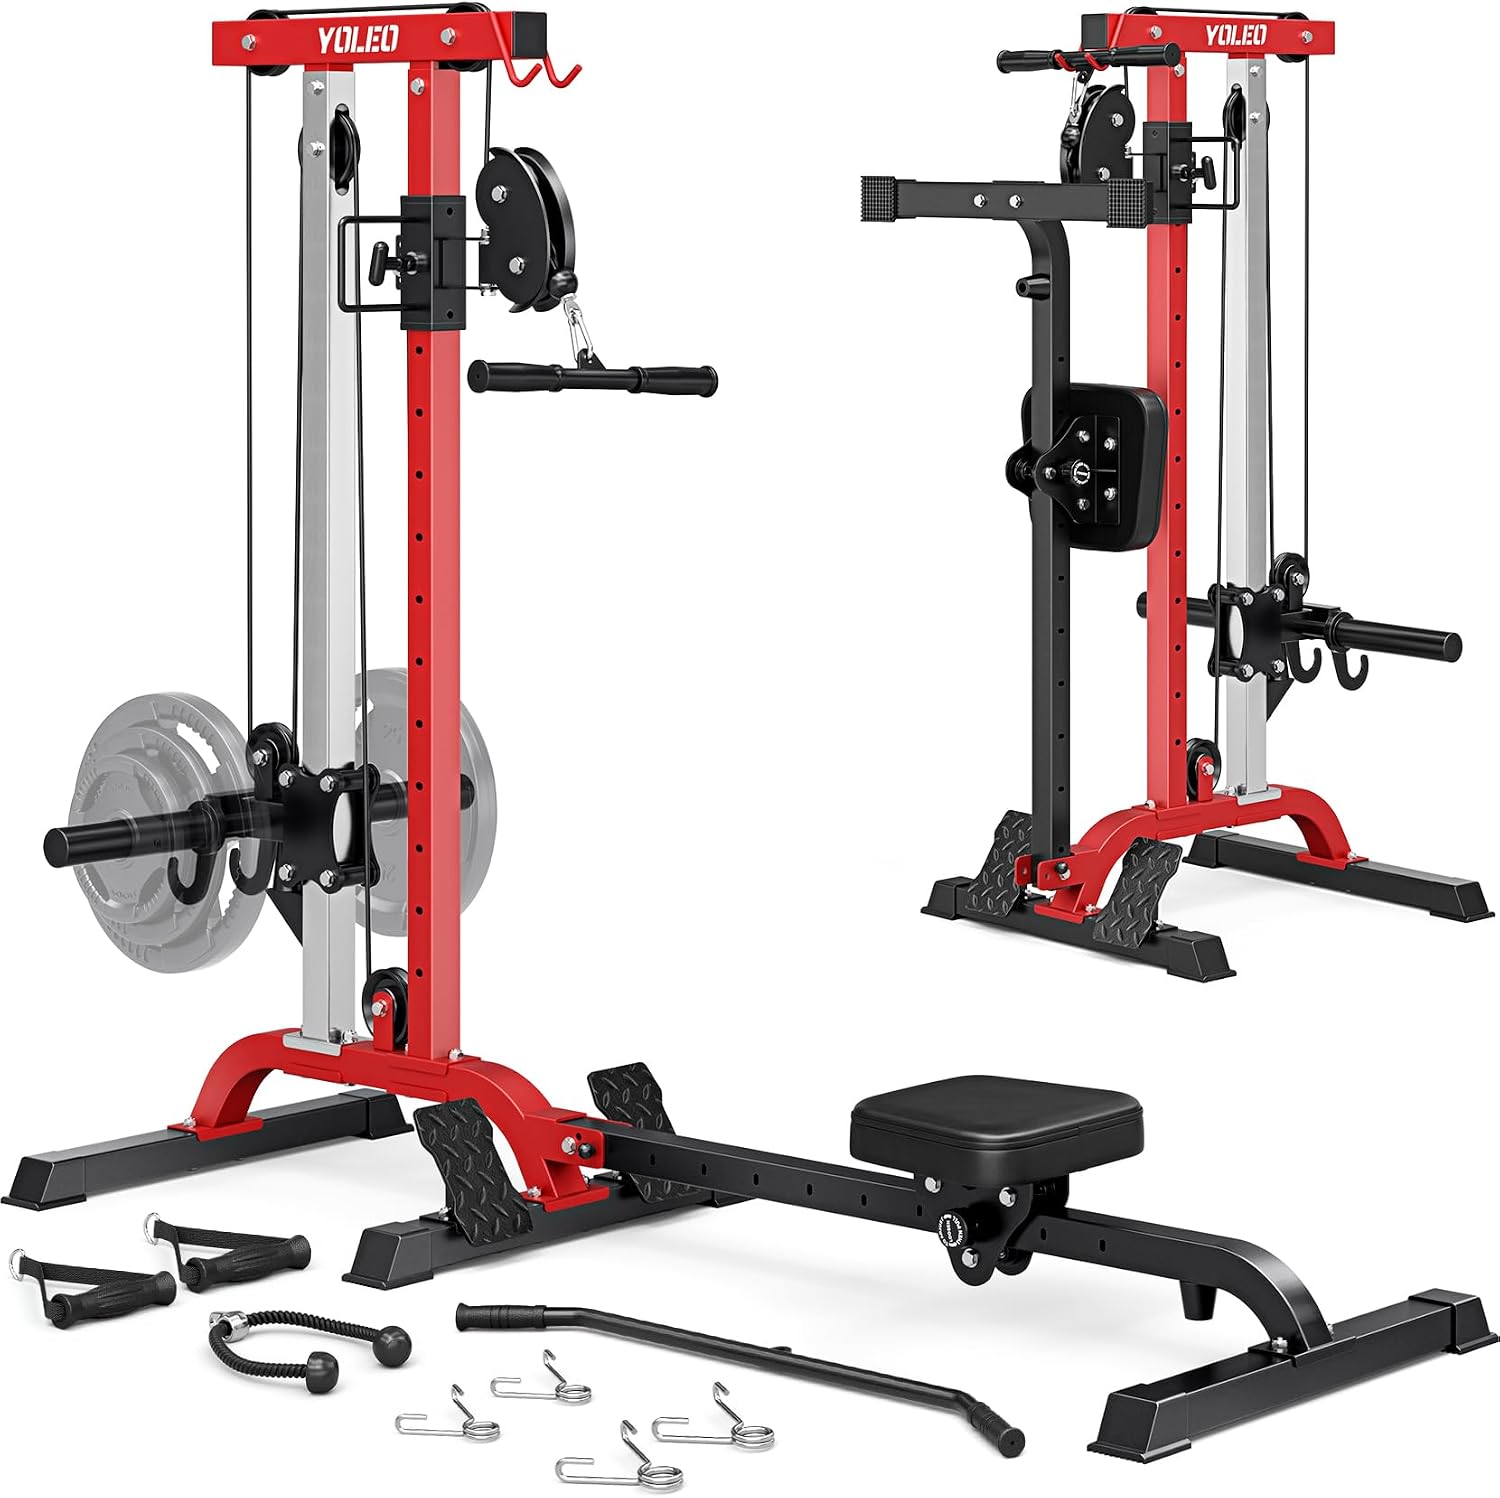
If you still need a machine: 2 in 1 Rowing & Cable Machine for Home Gym, 450 Lbs Capacity
 Visit on Amazon →
Not everyone reading a maintenance guide already owns the machine. If you are shopping, this 2 in 1 unit combines a rowing machine and a cable station on one frame with a 450 pound capacity, which is the appeal for a small home gym: one footprint, two jobs.
The maintenance angle is what matters here. A machine that does two jobs has two systems to keep clean, so the cable pulley path and the rowing mechanism both need the same attention. Check the bolts at every junction when it arrives, because a combo frame has more of them than a pure rower, and re-check them after the first week once everything has settled.
Flaws but not dealbreakers: A 2 in 1 machine is a compromise by design. The stroke on a dedicated air rower will feel more consistent through the drive, and the cable work will not match a dedicated cable tower. What you get in return is floor space and one purchase instead of two.
Anyone with a spare corner and a short list of exercises will get more use out of this than out of two machines they have to store.
The actual maintenance workflow
Do it in this order, once a month for a home machine, or every 50 hours of rowing if you are putting in serious meters.
Step one: clear the rail. Vacuum or wipe the monorail before anything else. Dust and hair collect under the seat rollers, and rolling a dirty seat back and forth is how you wear a flat spot into the rollers. A flat spot is the wobble you feel at the finish.
Step two: inspect the chain. Pull the handle all the way out and look at the chain against a light. You are looking for two things: rust, which shows as orange or brown flecks, and stiff links, which you find by running the chain through your fingers and feeling for a link that does not bend freely.
Step three: oil the chain. Wipe first, then a thin coat along the links, then two easy minutes of rowing to distribute it. If the chain was very dry, do a second thin coat a week later rather than one heavy coat now.
Step four: the seat and rollers. Wipe the rollers with a dry rag. Do not spray lubricant on them. If the seat squeaks or clicks, the fix is usually cleaning the rail and the roller surfaces, not adding oil, which only traps more grit.
Step five: the handle and the return. Check the handle for cracks and the chain or strap for fraying. On a chain machine, look at where the chain attaches to the handle. On a strap machine, look for a fuzzy edge, which is the first sign the strap is on its way out.
Step six: bolts and frame. Walk the frame with an Allen key and check every bolt you can reach, especially the ones at the front legs and under the seat. A machine that rocks side to side at the drive is usually one loose bolt, not a bent frame.
Step seven: the monitor and batteries. Pull the batteries if you will not use the machine for a month. Corroded batteries are the number one cause of a dead monitor, and a dead monitor turns a good rower into a clothes rack.
Step eight: check the drag factor. On a Concept2, open the monitor menu and check the drag factor at a few damper settings. If the number at the same damper setting has dropped since last month, the fan cage or the chain is dirty. Clean both, then recheck.
Chain, water, magnetic: what changes
A chain-drive air rower needs the full routine above.
A water rower needs the tank treated instead. You are managing water, not metal, so your job is checking the water level, keeping the tank out of direct sun, and treating the water so it does not go cloudy. The chain steps do not apply, but the rail and seat steps absolutely do.
A magnetic rower needs the least. There is no chain and no tank, so your job is the rail, the seat rollers, the bolts, and the monitor. If a magnetic machine feels like stirring soup, that is the resistance system doing what it does, not a maintenance problem.
What this all costs
The chain oil is the cheapest part of this article and the one that prevents the most expensive problem. Check current Amazon price on the bottle, then compare that to what a replacement chain and sprocket run, or to what a new rower costs.
The 2 in 1 machine is the bigger decision, and it is a different kind of purchase. Check current Amazon price on that one before you weigh it against a dedicated rower plus a separate cable setup, because the math usually favors the combo on space and favors the dedicated machines on feel.
Spread across the years you will own the machine, a bottle of chain oil every few months is a rounding error. A replacement chain is not.
The mistakes I see most
Skipping the chain until it clicks. By the time you hear it, you are oiling a chain that has already worn against the sprocket.
Oiling a dirty chain. Wipe first, always. Otherwise you are building grinding paste.
Spraying lubricant on the seat rollers. It feels better for a day and worse for a year.
Ignoring the monitor. If the monitor does not show split, you are rowing blind, and blind rowing is how people quit. Fix the batteries.
Bottom line
Home rowing machine maintenance is a 20 minute job once a month, and almost all of it is the chain and the rail. Keep a bottle of chain oil with the machine, wipe before you oil, clean the rail before you sit down, and check the bolts twice a year.
The machine is 20% of the workout and your technique is the other 80%. But a machine with a stiff chain and a clicking seat takes that 20% away from you one stroke at a time.