Most people unbox a rower, drop it in front of the television, sit down, and pull. Twenty minutes later their lower back is complaining, the seat is clicking, and the machine feels like it is fighting them. A home rowing machine setup is not complicated, but it does have an order: where the machine lives, how the rail sits, what the resistance is set to, what the monitor is showing you, and what your first session actually looks like.
I have coached more than a thousand people onto a rowing machine, first at a CrossFit box and then at a dedicated rowing studio in Seattle. Here is the part nobody wants to hear. The machine is maybe 20 percent of the workout. The other 80 percent is what you do on it, and that starts with how you set it up.
The sequence below works on any rower. If you are still shopping, I have two machines I would put in a home gym further down, and both of them get the exact same setup as a studio erg.
Why you should trust me
I'm Jess. I rowed in college, then coached indoor rowing at a CrossFit box and a dedicated rowing studio, where I have taught more than a thousand people to row on a machine. I test the way I coach: a 20-minute steady-state piece, sprint intervals, and the tall person and short person fit test, because a machine that fits me is not proof of anything.
That gives me two habits. I will not recommend a machine I have not rowed a real session on. And I will tell you when the machine is not the problem, which is most of the time.
How I picked and how I tested
Every machine gets the same four questions, and they are the same questions I ask standing in front of one at a showroom. Does the resistance feel consistent from the catch through the finish, or does it drop off halfway? Does the monitor show split per 500 meters, or only calories? Does the seat roll smooth and quiet down the whole rail? Would I put a beginner on it for their first 20 minutes?
Those questions are why the two machines below made the list and why a lot of cheap folding rowers do not. A rail that flexes under load will tell you about it in the first month. A monitor that only counts calories is a marketing device, not a training tool. And a seat that clicks is a machine that will annoy you every session until you stop using it.
I do not call anything quiet without listening for it, and I do not call anything stable without rowing hard on it. That is the standard for everything in this article.
What you need before the machine goes down
Four things, and none of them cost much. First, floor space: plan on about seven feet of length for the rail, plus a foot behind the machine for the recovery and two feet on either side so your elbows clear. Second, a mat or a rug you do not care about, because the rear stabilizer sits on the floor and hard floors transmit every vibration. Third, water within reach from the seat. Fourth, a plan for what you are doing, because a machine without a plan becomes a clothes rack.
If the machine shares a room with furniture, measure the door swing and the walking path before you commit. I have moved a rower three times in one apartment because the first spot was technically long enough and practically not.
How to set up the machine, step by step
Step one: level the rail. The machine should sit flat without rocking when you press down on the rear stabilizer. Most machines have adjustable feet or a leveling knob. Use it. A rail that rocks makes every stroke feel like a different stroke.
Step two: check the rail joint. If the machine folds or breaks into two pieces, the joint is where flex lives. Push down on the rail at the joint with your hand and watch for movement. If you can see it flex now, you will feel it at a 24 stroke rate later.
Step three: set the footplates. Strap in with the ball of your foot at the base of the plate and the strap across the widest part of your foot, not your toes. Your heels should be able to lift slightly at the catch. This is the single most common setup mistake I fix in person.
Step four: sit and roll. Sit down, put your feet in, and slide from the catch to the finish without pulling the handle. Listen for two things: a click from the seat and a grinding sound from the rollers. Both mean the machine needs attention before you row hard on it.
Step five: set the monitor units. Find the units menu and switch to split per 500 meters. Calories on a rowing monitor come from a formula, and the formula does not know your body. The split is honest. If your machine only shows calories, use time and stroke rate as your numbers instead.
Step six: do the tall person and short person check. Sit at the catch with your shins vertical. If your knees are above your chest or your heels are completely off the plate, the machine is telling you about its geometry. Adjust the footplate height, and if there is no adjustment, know that before you build a training plan around it.
How to set the resistance
The resistance setting is the most misunderstood part of the machine, so here is the short version.
On an air rower, the damper is not a difficulty knob. It changes how the flywheel feels, not how hard you have to pull. A higher damper means a heavier, slower stroke; a lower damper means a quicker catch. The number that actually matters is the drag factor on the monitor, and if your machine shows it, use it. If it does not, start in the middle of the damper range and adjust by feel, not by pride.
On a magnetic rower, the dial or console level genuinely changes the load. That is the trade. Magnetic machines let you dial resistance up and down; air machines give you a stroke that responds to how hard you pull. Neither is wrong. Magnetic resistance that feels like stirring soup is wrong, and you will know it in one session.
Either way, do not set resistance on day one and leave it forever. Set it for the session you are doing. Long steady pieces usually want a lighter setting and a higher stroke rate. Short intervals want a heavier setting and a lower rate.
The two machines I would put in a home gym
These are the two I would set up for the way most people actually train. Both get the setup sequence above.
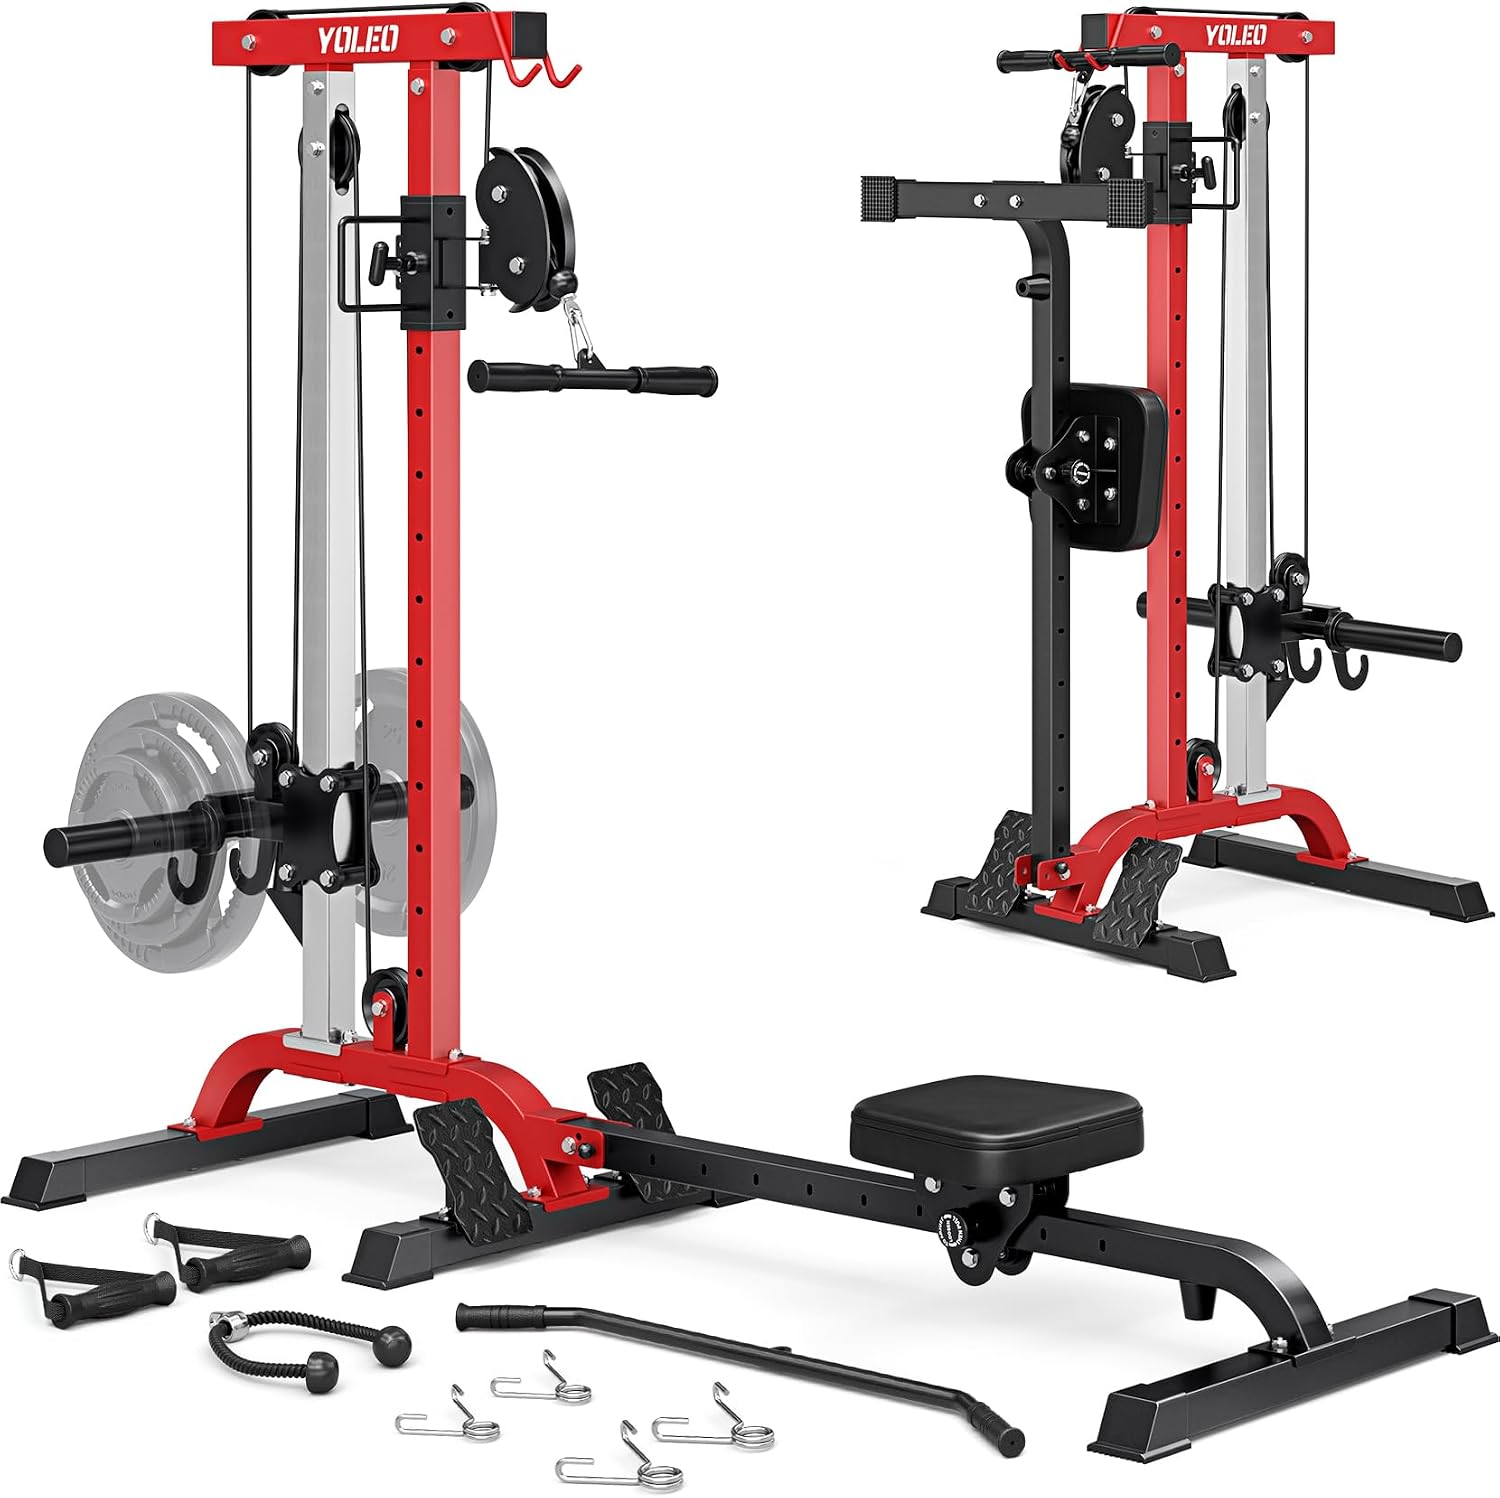
Budget pick: 2 in 1 Rowing & Cable Machine for Home Gym, 450 Lbs Capacity
 Visit on Amazon →
This is the machine I point people to when they have one corner of a room and two jobs to cover. It rows, and it also works as a cable station, so the same footprint handles lat pulldowns, cable rows, and face pulls. The frame is rated to 450 pounds, which is the number I look for in this category, and the magnetic resistance means the row itself is smooth and neighbor-friendly.
A 2-in-1 always asks for a compromise somewhere. The cable tower adds height and mass a dedicated rower does not have, so measure your ceiling and your storage path before you commit. The rail geometry on a combination machine is rarely as long as a studio erg, so if you are tall, run the catch-position check from step six before you buy. Check current Amazon price before you decide, since this class of machine moves around.
Flaws but not dealbreakers: The cable side of a 2-in-1 is not a commercial cable stack, so do not plan on heavy lat pulldowns at your one-rep max. As a second station for accessory work and rows, it does exactly what it should.
Anyone with one room, limited storage, and a plan that mixes rowing with strength work will get the most out of this.
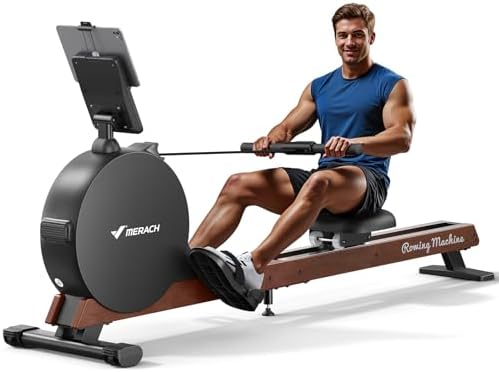
Upgrade pick: MERACH Pro-Grade Rowing Machines for Home, Smart Magnetic Rowing Machine with Self-Generation, Double Resistance and 400 LBS MAX Load, Wooden Tracks for Silent Sliding
 Visit on Amazon →
This is the one I would buy if rowing is the main event and not a side dish. The wooden tracks are the reason it made the list. Wood and good rollers are the design I trust most for a slide that stays quiet and consistent, and consistent is the word that matters on a rail. The double resistance system gives you more than one way to set the load, and self-generation means there is no cord to route across your floor and no outlet to fight for.
The 400 pound max load rating puts it in the same working class as the machine above, and the smart console is where the training actually happens, which is why I care about what the monitor shows more than what the frame looks like.
Two honest caveats. First, "silent sliding" is the manufacturer's phrase, and my rule is that quiet is a property of the rail, not a promise. Wooden rails with clean rollers are the quietest design I row, and they still make a sound at the finish. Second, a smart console is only smart if you use it. If you will not connect to a class or an app, buy the machine for the row and treat the screen as a bonus. Check current Amazon price, because this is the tier where the listing moves most.
Flaws but not dealbreakers: Self-generation means the console powers up from your rowing, so it needs a stroke or two before it wakes. That is a feature, not a bug, but it is worth knowing on day one.
Anyone who wants one machine, a quiet rail, and a console they will actually open is the target buyer here.
Your first 20-minute session, minute by minute
Minutes 0 to 3: warm up. Row easy at a stroke rate around 18 to 20. Legs only for the first minute, then add the body swing, then the arms. You are teaching your body the sequence, not chasing a number.
Minutes 3 to 20: steady state. Hold a rate between 20 and 24 and pick a split you could hold while talking. If you cannot talk, you are going too hard for a first session. This is the piece that builds the habit, and it is the piece most people skip on the way to intervals.
Last 2 minutes: cool down. Drop the rate, lengthen the recovery, and let your heart rate come down while you are still on the machine. Then get off, wipe the rail, and write down one number: the split you held. That number is your baseline, and every session after this one is measured against it.
Sprint intervals come in week two, not week one. Thirty seconds hard, ninety seconds easy, six to eight rounds. That is the whole prescription, and it will humble you faster than any machine feature will.
Technique notes that matter more than the machine
The stroke has two ends and people break form at both. At the catch, your shins should be vertical, your arms straight, and your back tall rather than rounded forward. At the finish, the handle comes to the bottom of your ribs, your elbows pass your body, and your legs are flat. Most beginners pull with their arms first. The order is legs, then hips, then arms on the drive, and arms, then hips, then legs on the recovery.
Stroke rate is not intensity. Rate is how many strokes per minute; split is how much work each one does. A 20 rate can be harder than a 30 rate if you are pushing with your legs. This is the biggest mental shift for new rowers, and it is the reason I set the monitor to split.
If the seat squeaks, listen to it. That sound is information about the rail, the rollers, or the joint, and it is cheaper to fix now than to replace the machine later.
The maintenance log nobody keeps
Two minutes a week. Wipe the rail with a dry cloth so grit does not get into the rollers. Check the bolts at the footplates and the rear stabilizer, because they loosen. Look at the seat rollers for flat spots. If the console takes batteries, replace them before they die mid-piece, because a monitor that dies at minute 14 of a 20-minute piece will ruin your day.
Once a month, run the seat roll test from step four. If the roll has gotten rougher, the machine is telling you something. Listen.
What actually decides whether this works
The machine is 20 percent of the workout. The setup is another 10 percent, and it takes about 20 minutes once. The remaining 70 percent is showing up three times a week for a month, and no buying decision can do that part for you.
Set the rail flat, set the monitor to split, set your feet properly, and row 20 minutes. Then do it again next week. That is the whole method, and it works on either machine above. Check current Amazon price when you are ready, but do the setup first. Your machine was built to do this. Let it.