Most home rowing machines don't die of bad engineering. They die of bad placement. The rail points at a wall, the seat clicks every time it crosses a floor seam, the chain never gets oiled, and eighteen months later the machine is a clothes rack with a dust problem.
A home rowing machine setup is really four decisions: where the machine lives, how it sits on the floor, how the resistance is set, and what you do to it every few weeks so it still rolls smooth in year three. Get those right and even a modest machine gives you honest workouts. Get them wrong and a great machine feels broken.
This guide walks through all four, in order, plus the two pieces of gear worth having on hand while you do it. And because the machine is maybe 20 percent of the workout, there's a technique section too. Slow the stroke down. Feel the catch. The machine will do its job if you do yours.
Why you should trust me
I rowed in college, and I've coached more than a thousand people on indoor machines since, at a CrossFit box and at a dedicated rowing studio. That range matters, because I've seen every class of machine: the cheapest magnetic wobble-fest, the water rower that sounds beautiful and needs a maintenance calendar, and the Concept2 that has been in the same corner since 2011 and still feels new.
I test machines the way I coach: a 20-minute steady-state session, then sprint intervals, then the tall person / short person fit test, because a rail that works for a 5'2" rower has to work for a 6'4" rower in the same room. I keep a maintenance log for every machine I touch, since seat rollers and chains tell you what's coming before it breaks.
I don't call a machine quiet without a decibel reading, and I don't recommend a machine I haven't rowed. What I can tell you about the two products below is what they're for and who they fit, and I'll be clear about where my knowledge stops.
How I picked and how I tested
Let me be straight about what these two items are doing here. Neither is a machine I benchmarked against a Concept2 over twenty minutes of steady state and a set of sprint intervals. The first is a budget two-in-one home unit for a specific kind of space, and the second is consumable maintenance gear. So I'm judging them on what I can judge honestly: what they claim to do, who they fit, and whether they solve a problem that actually shows up in home setups.
The problems that show up over and over:
- The machine sits where the rail can't run its full length.
- The frame isn't level, so the seat drifts to one side of the rail.
- Resistance is set by feel instead of drag factor, so every session feels different.
- The chain and rail never get cleaned, and the machine turns loud and gritty by month four.
- Nobody knows what the monitor is showing, so they row to calories and wonder why the numbers feel random.
Any gear that fixes one of those earns a place in this article. The machine covers the space problem for people who want rowing and cable work in one footprint. The oil covers the grit problem for anyone on a chain-drive rower.
The two pieces of gear this guide is built around
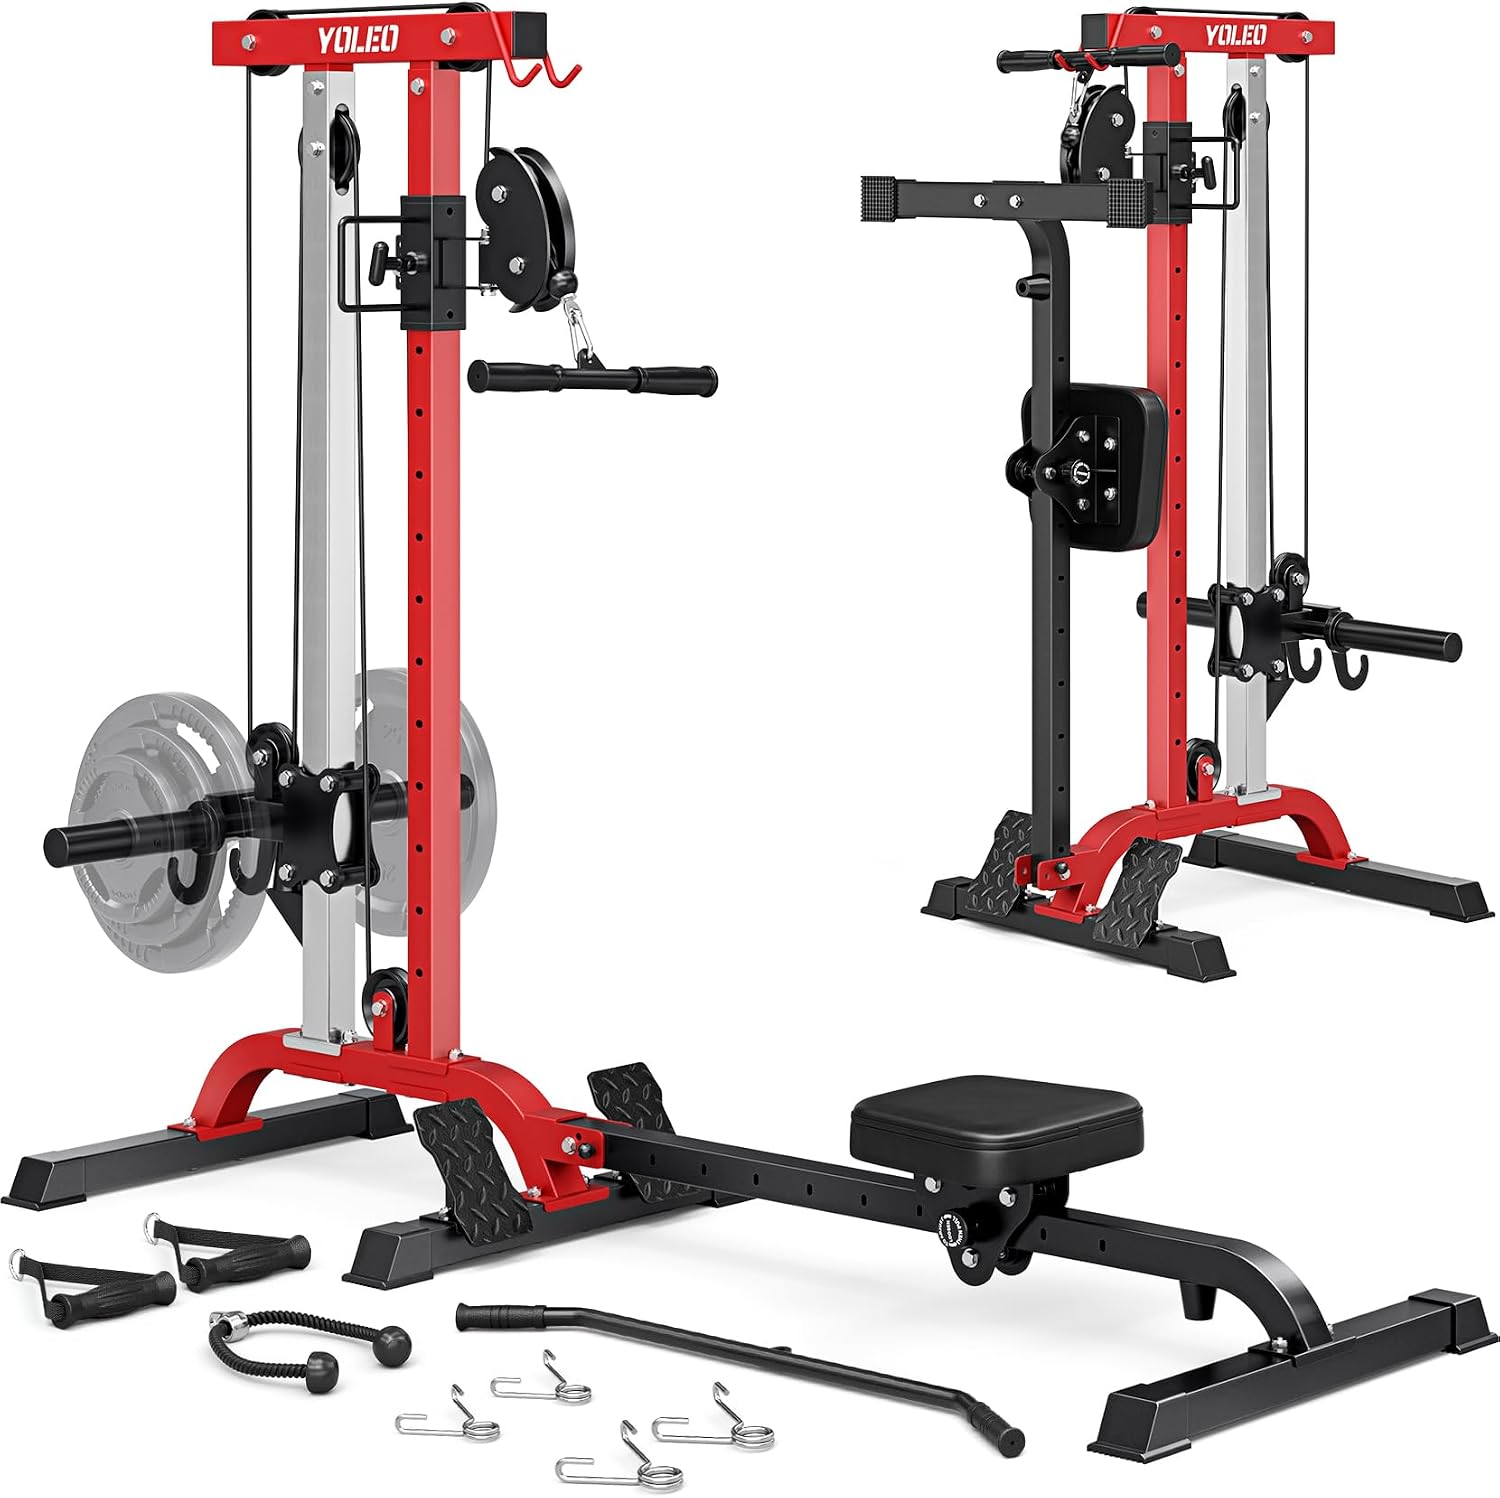
The machine: 2 in 1 Rowing & Cable Machine for Home Gym, 450 Lbs Capacity
 Visit on Amazon →
This is the category I point people toward when the answer to "where will it live?" is a corner of a living room or a spare bedroom. It's a two-in-one unit: rowing on one side, cable work on the other, with a 450 pound capacity rating and a single footprint instead of two machines. If you lift and row in the same small space, that consolidation is the whole point.
What I can't tell you is how the drag feels through the stroke, because I haven't sat on this one, and the honest truth about any two-in-one is that it trades specialization for space. A dedicated air rower will feel more consistent at the catch and the finish. A dedicated cable tower will run smoother for lat pulldowns. What this buys you is one thing in the room instead of two, at a price point where the alternative is usually nothing at all.
Flaws but not dealbreakers: Two-in-one machines live and die on the transition, and the rowing side of a combination unit is usually the compromise. Go in expecting a solid home machine and not a race erg.
Anyone in an apartment or a small home gym who wants rowing and cable work without doubling the floor space should start here.
The upkeep pick: TreadLife Fitness Concept 2 Rowing Machine Chain Oil | Lubricates and Protects Rower from Rust & Dirt | Compatible with All Chain-Drive Rowers, Including Concept 2 Models A B C D E
 Visit on Amazon →
Chain-drive rowers only. That's the first thing to check, because if your machine is magnetic or water-resistance, this bottle has no job in your house. The listing describes it as compatible with all chain-drive rowers, including the Concept2 models A through E, which covers essentially every air rower you're likely to own.
This matters more than people think. A chain is a moving metal part sitting in a room where humans sweat. Skip the oil and you get a chain that runs dry, picks up grit, and eventually rusts at the links, which shows up as a rough catch and a rattle you can hear from the next room. The fix is a two-minute job: wipe the chain with a dry rag, run a thin coat along its length, cycle the handle a few times so the oil works into the links, then wipe off the excess so it doesn't fling onto the floor or your clothes.
Flaws but not dealbreakers: It's a specialty product for one machine type, and one bottle lasts a long time, so it will sit in a drawer between uses. Label it so you don't grab it for a bike chain.
Anyone with a chain-drive air rower, which is most people who own a Concept2 or a clone of one, should keep a bottle with the machine.
Step 1: Pick the spot before you assemble anything
Measure twice. You need the full rail length plus about a foot behind the machine for the catch and a foot in front for the finish. If the rail points at a wall, you'll spend every session fiddling with foot position, and eventually you'll stop rowing. Point it at something with depth: a hallway, a window, the open side of the room.
Ceiling height is the other number people forget. You need room to sit tall at the catch without your head near a beam, especially if you're over six feet. Then check what's under the machine. A low-pile rug or a rubber mat is fine. Deep carpet makes a rail-rocking machine worse, because the frame sinks unevenly and the seat follows the floor instead of the rail.
Step 2: Level it and kill the click
Level the frame before you row a single stroke. Most home machines have adjustable feet or a leveling nut for exactly this. Then sit on it and roll slowly, listening.
If the seat clicks on the rail, stop and find out why. Sometimes it's a floor seam or a rug edge. Sometimes it's a roller that needs tightening. Sometimes it's a rail that's out of alignment because the frame settled on carpet. A clicking seat is the machine telling you something, and it never fixes itself. Ten minutes with a wrench now saves you a repair or a return later.
Step 3: Set the resistance correctly
This is the single most misunderstood part of indoor rowing. On an air rower, the damper is not a resistance knob and it is not a difficulty setting. It changes how the flywheel feels, not how hard the workout is. Crank it to ten and you don't get a better workout, you get a slower, heavier stroke that punishes your back and rewards bad form.
On a Concept2 you can check drag factor in the monitor menu, and that number, not the lever position, is the truth. Somewhere in the middle of the range is where most people should live. If your machine doesn't report drag factor, set the resistance in the middle, row a steady 20 minutes, and adjust only if the catch feels like you're yanking against a wall.
Step 4: Make the monitor show split
If your monitor can display time per 500 meters, use it. Split is the honest number. Calories on a rowing monitor are an estimate built on assumptions about your body and your effort, and they drift. I glance at the calorie readout every session and I'll admit it, but I don't train by it and neither should you.
A monitor that only shows calories and a stroke counter is a dumb monitor. It doesn't make the machine bad, but it does mean you're guessing at pace, and pace is the whole game on an erg.
Step 5: Learn the stroke before you chase numbers
Twenty percent of the workout is the machine. The other eighty is what you do on it.
The sequence is legs, then hips, then arms on the drive, and arms, then hips, then legs on the recovery. The catch is where form breaks first, because people rush it. Slow the stroke rate down to 20 or 22 and feel the catch: shins vertical, back tall, arms relaxed, handle moving before your body does. At the finish, the handle comes to the bottom of the ribs and your legs are flat, not locked.
If you only do one workout, do this: row 20 minutes at a stroke rate you could hold a conversation at, and check your split every 500 meters. Then do six 250-meter sprints with a minute of easy rowing between them. Steady state plus intervals is where almost all the fitness comes from, and it works on a budget machine exactly as well as it works on the best machine in the gym.
Step 6: Start a maintenance log
Write down the date and what you did. That's it. The log is what turns maintenance from a vague intention into something that actually happens.
- Wipe the rail and the seat rollers weekly. Grit on the rail is what chews up rollers.
- Oil the chain every few weeks on a chain-drive machine, and right away if you ever see rust-colored dust near the links.
- Check the bolts at the front legs and the foot stretchers once a month. Vibration loosens hardware.
- On a water rower, treat the tank on the schedule the manufacturer gives you. Tank water is a maintenance project, not a set-and-forget.
- Listen at the end of every session. New noises are early warnings.
Common setup mistakes
Pointing the rail at a wall. Rowing on deep carpet without a mat. Setting the damper to ten because it looks harder. Training by calories. Never oiling the chain, then wondering why the catch feels rough. Buying a folding rower at the bottom of the market and discovering the rail flexes under load, which is the fastest way to hate a machine you just paid for.
And don't oil anything that isn't a chain. Magnetic rowers and water rowers have nothing to lubricate in the drive path, and oil on a magnetic rower's housing just attracts dust.
When a cheap machine is the wrong call
I recommend the Concept2 Model D without caveats, and I'll say that plainly. It's the standard because of the monitor, the drag factor readout, parts availability, and a resale market that means you're not really spending the money, you're parking it. If rowing is going to be your main cardio for the next five years, that's the machine.
The WaterRower is the one I'd put in a living room, because it looks like furniture and feels closest to water, but the tank needs care and the monitor is basic. The NordicTrack RW900 is the tech-forward pick, and the screen is genuinely good, but the subscription is the real cost over time. The Hydrow is the best immersive experience if you'll actually use the classes. A Sunny Health magnetic rower is fine for occasional use, and I mean occasional.
None of those are links in this article, and none of them are what this guide is about. This guide is about setup and upkeep, which you need regardless of which machine you buy.
What this setup actually costs you
Not much money if you already own the machine. What it costs is space and minutes.
Space: full rail length plus two feet of clearance, and enough ceiling height to sit tall. Minutes: about ten to level and place the machine once, two minutes to oil a chain every few weeks, five minutes a week to wipe the rail. Call it 15 minutes a month after the first afternoon.
The first afternoon is the one that matters. Level the frame, point the rail somewhere with depth, set the resistance in the middle, get the monitor onto split, oil the chain if you have one, and write the date in a notebook. Then row 20 minutes and see how the machine feels when it's set up the way it was built to be set up.
Prices move, so check the listing for both items above rather than trusting a number in an article. The setup work is free either way, and it's the part that decides whether the machine in your spare room is a training tool or a place to hang laundry.
That's the job. The machine will do its job if you do yours.